

We’ve got you covered on how to smoothly make the switch in WordPress.
Why Go for Google Analytics 4?
Google Analytics 4 (GA4) is the newest version, packed with features to track both mobile apps and websites under one account. Plus, it brings in fresh metrics, reports, and tracking capabilities. If you haven’t set up a GA4 property yet, now’s the perfect time! The previous Universal Analytics shut down on July 1, 2023.
Here’s the scoop: Once Universal Analytics shuts down, it won’t process data from your WordPress site anymore.While you can still access your old data for a while, it’ll stop showing old reports by July 2024. That’s a bummer for losing your historical data.
Switching to Google Analytics 4 shields you from starting afresh with zero historical data. This move ensures your data’s future while giving you ample time to get familiar with the new Google Analytics dashboard and features.
Now, let’s dive into how you can switch to Google Analytics 4 in WordPress.
Creating a Google Analytics 4 Property
If you already have a Google Analytics account using the old version, don’t worry. You can easily create a new GA4 property and start sending stats over to GA4.
First, you will need to visit the Google Analytics website and log in to your account.
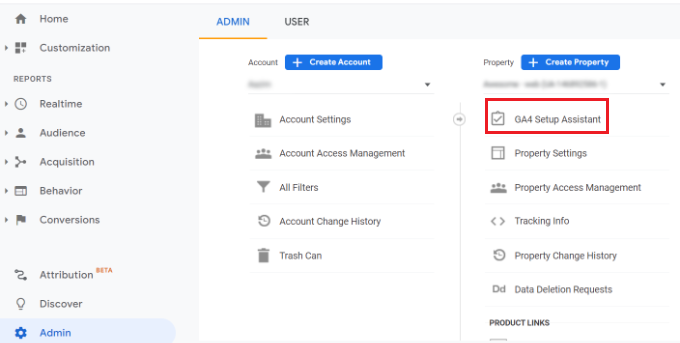
After that, head over to the ‘Admin’ settings in the bottom left corner.
If you are on classic Google Analytics, then you will see the option to set up GA4.
Go ahead and click on ‘GA4 Setup Assistant’ under the Property column.
In the next step, the setup assistant will give you 2 options. You can create a new Google Analytics 4 property or connect an existing one. Since we are setting up a new property, simply click the ‘Get Started’ button under the ‘I want to create a new Google Analytics 4 property’ option.
If you’ve implemented your Universal Analytics using the Global Site Tag (gtag.js) code, then you’ll see an option to Enable data collection using existing tags.
This uses the existing tracking code on your site to collect information. That said, if you don’t already have the right tracking code on your website, then we will show you how to add it to your WordPress blog below.
For now, you can go ahead and click the ‘Create property’ button.
The setup wizard will add a new GA4 property and copy the Universal Analytics property name, website URL, timezone, and currency settings.
You can now view your new Google Analytics 4 property in the GA4 Setup Assistant.
Next, you’ll need to click on the ‘Go to your GA4 property’ button to see your Google Analytics tracking code.
From here, you can click on the ‘Collect website and app data’ option and select the ‘Manage data streams’ option.
You should now see your new GA4 property under Data Streams.
Go ahead and click on your new property.
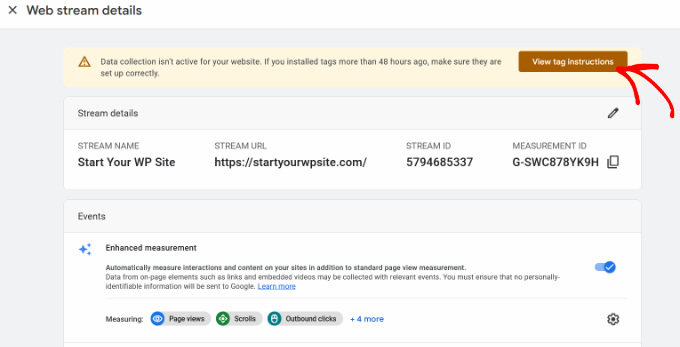
A new window will slide in from the right, and you’ll be able to see your web stream details.
Note: Google Analytics 4 uses both data stream and web stream. These both simply mean the flow of analytics data that Google Analytics receives from your website.
Simply click the ‘View tag instructions’ button at the top.
Next, you’ll see different ways to connect your WordPress site with Google Analytics.
You can also manually add the tracking code to your site.
Simply switch to the ‘Install manually’ tab to view the code.
One thing you need to know is that Google Analytics 4 reports are quite different than what you are used to in Universal Analytics.